ShopDreamUp AI ArtDreamUp

Deviation Actions
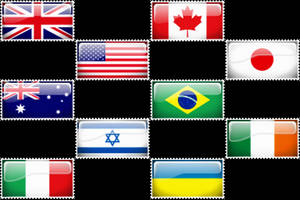
COUNTRY FLAG STAMP COLLECTION
Show your support/allegiance to a country by proudly flying the flag on DeviantART.
$1/month


Suggested Deviants


Suggested Collections


You Might Like…


Description
okay..so as "requested" by a friend of mine i created a tutorial showing how i do the stuff i do.
first of all: im going to show how i work and what works (at the moment) the best for me. im basically using several techniques i learned by watching other artists.
i dont think its a good tutorial. there are many gaps and..well...just see for yourself..i jsut hope i can help at least one person with this xD
Final picture here: [link]
ok. here we go
first off:
i use photoshop CS4 but this should work with older versions of it too.
in fact..untill step 10 you can use any programm you want to
Step 1
this is basically just a sketch of what im going to color.
usually pretty messy^^"
Step 2
bottom layer: neutral background
above that: what im working on
top layer: sketch. set to multiply, about 10-20% opacity
chose the lightsource. (right) and threw some basic colors in.
Step 3
blurring.
go to filters->blur->gaussuan blur and blur it good.
this smoothens what you did so far.
Step 4
vreate a new layer above thecolor layer. take a thin hard-brush and crosshatch some highlights and shadows.
Step 5
blur the crosshatching and merge the layer with the color layer. this defines some highlights and shadows but also gives structure and texture to ur picture.
Step 6
create a new layer and define the wrinkles, eyes and stuff.
i also defined the contours of the face
next i painted the mouth.
Step 7
drew the eyes and worked on the shadows and highlights.
Step 8
cleaned the picture up using the pen tool.
lovered the eyebrows and defined the eyes some more.
started painting the hair. (first amjor gap. im not showing how to draw the hair..because im not that good at it and its enough stuff to make an own tutorial about)
he also got his love-patch now :3
Step 9
time for clothing and stuff.
drew the glasses. (notice: the glasses' glasses are only highlights.)
he now has a tie and a shirt. yay
Step 10
time for custom brushes. i will list good sources below.
keep in mind to create new layers when using custom brushes to prevent totally screwing up.
added pores. facial hair and some spots you will eventually get when ur geting older
blending-modes:
overlay for shadows
screen for highlights
Step 11
i decided to give him a jacket. added some more deteils to the hair. tried to add some more volume to his face and threw in some other tones.
i also added 2 adjustment layers.
one that edits the curves and one tht give the picture a blue tint.
Step 12
pick on me because this tutorial sucks.
some random notes:
use photo-references.
ask someone who knows what s/he is doing for advice
have fun
practice
practice
buy me a sammich
practice
brush-sources:
i use brushes from:

and

k..so..hope this helped
first of all: im going to show how i work and what works (at the moment) the best for me. im basically using several techniques i learned by watching other artists.
i dont think its a good tutorial. there are many gaps and..well...just see for yourself..i jsut hope i can help at least one person with this xD
Final picture here: [link]
ok. here we go
first off:
i use photoshop CS4 but this should work with older versions of it too.
in fact..untill step 10 you can use any programm you want to
Step 1
this is basically just a sketch of what im going to color.
usually pretty messy^^"
Step 2
bottom layer: neutral background
above that: what im working on
top layer: sketch. set to multiply, about 10-20% opacity
chose the lightsource. (right) and threw some basic colors in.
Step 3
blurring.
go to filters->blur->gaussuan blur and blur it good.
this smoothens what you did so far.
Step 4
vreate a new layer above thecolor layer. take a thin hard-brush and crosshatch some highlights and shadows.
Step 5
blur the crosshatching and merge the layer with the color layer. this defines some highlights and shadows but also gives structure and texture to ur picture.
Step 6
create a new layer and define the wrinkles, eyes and stuff.
i also defined the contours of the face
next i painted the mouth.
Step 7
drew the eyes and worked on the shadows and highlights.
Step 8
cleaned the picture up using the pen tool.
lovered the eyebrows and defined the eyes some more.
started painting the hair. (first amjor gap. im not showing how to draw the hair..because im not that good at it and its enough stuff to make an own tutorial about)
he also got his love-patch now :3
Step 9
time for clothing and stuff.
drew the glasses. (notice: the glasses' glasses are only highlights.)
he now has a tie and a shirt. yay
Step 10
time for custom brushes. i will list good sources below.
keep in mind to create new layers when using custom brushes to prevent totally screwing up.
added pores. facial hair and some spots you will eventually get when ur geting older
blending-modes:
overlay for shadows
screen for highlights
Step 11
i decided to give him a jacket. added some more deteils to the hair. tried to add some more volume to his face and threw in some other tones.
i also added 2 adjustment layers.
one that edits the curves and one tht give the picture a blue tint.
Step 12
pick on me because this tutorial sucks.
some random notes:
use photo-references.
ask someone who knows what s/he is doing for advice
have fun
practice
practice
buy me a sammich
practice
brush-sources:
i use brushes from:
and
k..so..hope this helped
Image size
1000x16775px 4.76 MB
© 2009 - 2024 DontFeedTheAxel
Comments14
Join the community to add your comment. Already a deviant? Log In
wow that's awesome well *_*